When you select → (or use the corresponding item in the main toolbar), Wireshark pops up the “Capture Options” dialog box as shown in Figure 4.3, “The “Capture Options” input tab”. If you are unsure which options to choose in this dialog box, leaving the defaults settings as they are should work well in many cases.
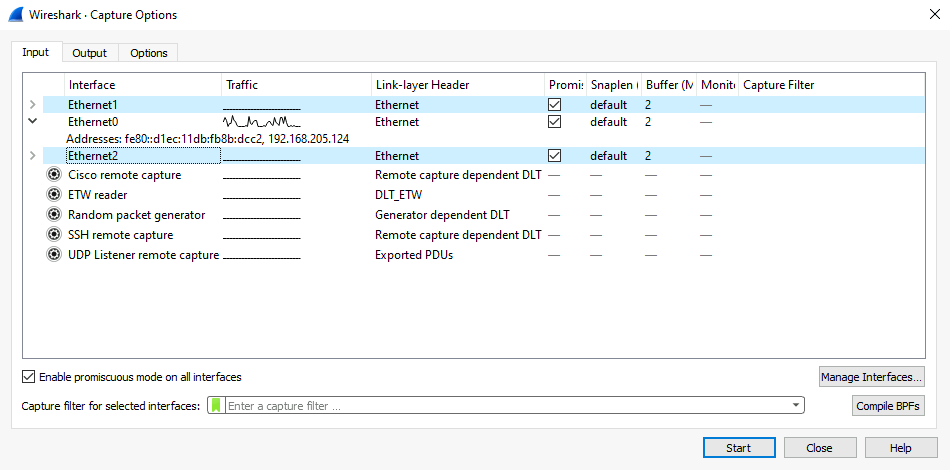
The “Input” tab contains the “Interface” table, which shows the following columns:
- Interface
-
The interface name.
Some interfaces allow or require configuration prior to capture. This will be indicated by a configuration icon (
 )
to the left of the interface name.
Clicking on the icon will show the configuration dialog for that interface.
)
to the left of the interface name.
Clicking on the icon will show the configuration dialog for that interface. - Traffic
- A sparkline showing network activity over time.
- Link-layer Header
- The type of packet captured by this interface. In some cases it is possible to change this. See Section 4.9, “Link-layer header type” for more details.
- Promiscuous
- Lets you put this interface in promiscuous mode while capturing. Note that another application might override this setting.
- Snaplen
- The snapshot length, or the number of bytes to capture for each packet. You can set an explicit length if needed, e.g., for performance or privacy reasons.
- Buffer
- The size of the kernel buffer that is reserved for capturing packets. You can increase or decrease this as needed, but the default is usually sufficient.
- Monitor Mode
- Lets you capture full, raw 802.11 headers. Support depends on the interface type, hardware, driver, and OS. Note that enabling this might disconnect you from your wireless network.
- Optimize
- Allows disabling the optimization applied by default when compiling the capture filter into bytecode. This affects both the actual capture and the bytecode shown in the Compiled Filter Output dialog. This should usually be left enabled, but might be useful if you suspect a bug in the optimizer, or for instructive purposes.
- Capture Filter
- The capture filter applied to this interface. You can edit the filter by double-clicking on it. See Section 4.10, “Filtering while capturing” for more details about capture filters.
Hovering over an interface or expanding it will show any associated IPv4 and IPv6 addresses.
If “Enable promiscuous mode on all interfaces” is enabled, the individual promiscuous mode settings above will be overridden.
“Capture filter for selected interfaces” can be used to set a filter for more than one interface at the same time.
opens the Figure 4.6, “The “Manage Interfaces” dialog box” where pipes can be defined, local interfaces scanned or hidden, or remote interfaces added.
opens Figure 4.7, “The “Compiled Filter Output” dialog box”, which shows you the compiled bytecode for your capture filter. This can help to better understand the capture filter you created.
![[Tip]](images/tip.svg) | Linux power user tip |
|---|---|
|
The execution of BPFs can be sped up on Linux by turning on BPF Just In Time compilation by executing $ echo 1 >/proc/sys/net/core/bpf_jit_enable if it is not enabled already. To make the change persistent you can use sysfsutils. |
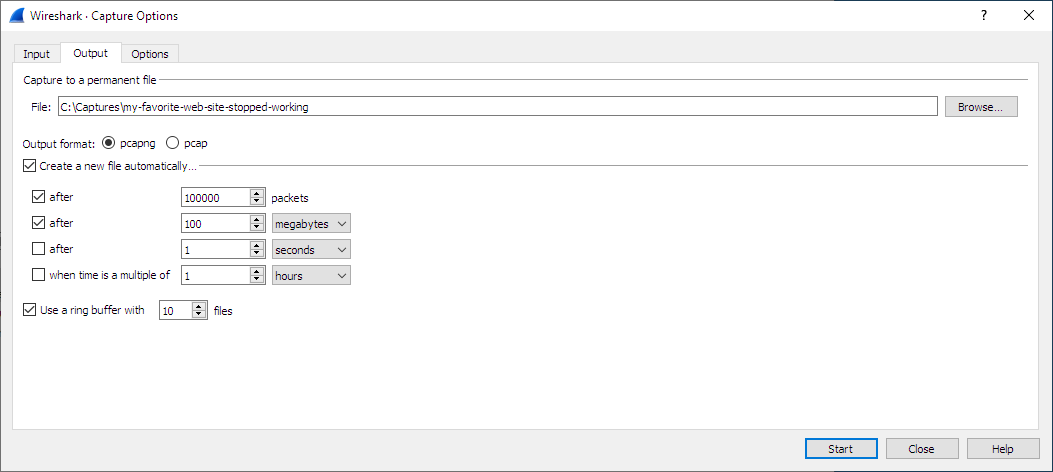
The “Output” tab shows the following information:
- Capture to a permanent file
-
- File
- This field allows you to specify the file name that will be used for the capture file. It is left blank by default. If left blank, the capture data will be stored in a temporary file. See Section 4.8, “Capture files and file modes” for details. You can also click on the button to the right of this field to browse through the filesystem.
- Output format
- Allows you to set the format of the capture file. pcapng is the default and is more flexible than pcap. pcapng might be required, e.g., if more than one interface is chosen for capturing. See https://wiki.wireshark.org/Development/PcapNg for more details on pcapng.
- Create a new file automatically…
-
Sets the conditions for switching a new capture file. A new capture file can be created based on the following conditions:
- The number of packets in the capture file.
- The size of the capture file.
- The duration of the capture file.
- The wall clock time.
- Use a ring buffer with
- Multiple files only. Form a ring buffer of the capture files with the given number of files.
More details about capture files can be found in Section 4.8, “Capture files and file modes”.
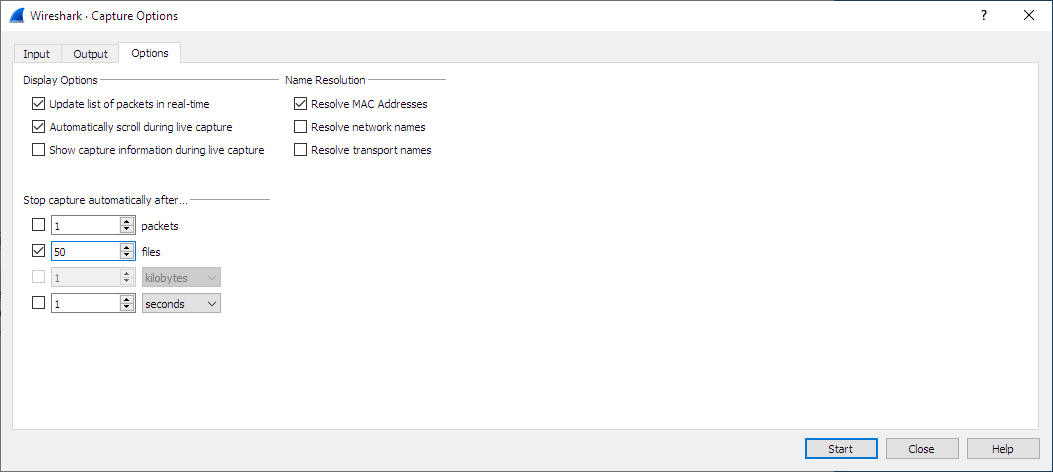
The “Options” tab shows the following information:
- Display Options
-
- Update list of packets in real-time
- Updates the packet list pane in real time during capture. If you do not enable this, Wireshark will not display any packets until you stop the capture. When you check this, Wireshark captures in a separate process and feeds the captures to the display process.
- Automatically scroll during live capture
- Scroll the packet list pane as new packets come in, so you are always looking at the most recent packet. Automatic scrolling is temporarily disabled when manually scrolling upwards or performing a "Go" action so that the selected packet can be examined. It will resume upon manually scrolling to the end of the packet list. If you do not specify this Wireshark adds new packets to the packet list but does not scroll the packet list pane. This option has no effect if “Update list of packets in real-time” is disabled.
- Show capture information during capture
- If this option is enabled, the capture information dialog described in Section 4.11, “While a Capture is running …” will be shown while packets are captured.
- Name Resolution
-
- Resolve MAC addresses
- Translate MAC addresses into names.
- Resolve network names
- Translate network addresses into names.
- Resolve transport names
- Translate transport names (port numbers).
See Section 7.9, “Name Resolution” for more details on each of these options.
- Stop capture automatically after…
-
Capturing can be stopped based on the following conditions:
- The number of packets in the capture file.
- The number of capture files.
- The capture file size.
- The capture file duration.
You can double-click on an interface row in the “Input“ tab or click from any tab to commence the capture. You can click to apply your changes and close the dialog.